The trim installation is mostly complete. We selected a stylish contemporary trim scheme with a bit of interesting flare. That's all we'll reveal until the pictures are available.
The driveway, which has been shortened and widened, is also complete and looks great. We highly recommend Duffy Willard Paving and Excavating for paving work. We shortened the driveway in order to make the usable sideyard area larger, and we widened the remaining paved area in order to be able to accomodate two cars side to side.
We have selected and purchased nearly all of our lighting fixtures and appliances, and we are now finalizing the door, kitchen cabinet and countertop orders. The doors will arrive within 2 weeks, and the kitchen materials will be delivered in early January.
The kitchen design includes natural oak shaker style cabinets, stainless steel Energy Star appliances, and black RecycleTop counters. The cabinets are made by an employee-owned company called Showplace, which is located in South Dakota and has made a strong commitment to environmental practices and products. Its cabinets are certified under the Environmental Stewardship Program of the Kitchen Cabinet Manufacturers Association. Oh, and they make beautiful cabinets. Here are links to their main webpage and information about their environmental practices:
http://www.showplacewood.com/
http://www.showplacewood.com/Home/envpol/SWP.envpol.html
The RecycleTop countertops are a neat, 100% recycled "papercrete" product. Here's some info: http://kliptech.com/index.php/products/recycletop
Finally, our antique flooring has been manufactured and is ready to be delivered and installed!
That's all the news for now...

Wednesday, December 7, 2011
Wednesday, November 23, 2011
Approaching the finish work!
The drywall is now close to being completed (and is looking great!) and the insulated box in the basement for the furnace and hot water heater has been built. Once the drywall is finished, it will be painted, and then the heating system and baseboard registers will be installed.
We're now well underway with making our finish selections as well. We've been working on the lighting design and selecting fixtures (our goal is for all lighting fixtures to be Energy Star Certified and/or installed with compact flourescent lightbulbs). We have also have selected our window and door trim.
This past week, we visited a neat operation in Springfield called Antique and Specialty Flooring Co, Inc. The business owner, Tony, reclaims wood from old barns, refurbishing it into beautiful flooring. We are still working out our exact flooring plan, but our basic plan is to reuse the existing wood flooring in the downstairs and upstairs of the original home, to reuse the ceiling wood we recovered above the rafters in the first addition (which we may use to box the exposed collar ties, or it could be used as flooring), and to purchase a mix of Tony's red and white oak from two barns taken down recently in Pennsylvania and Kentucky. More on the flooring plan when we nail down the final details...
Oh, and as you may have noticed if you are in the neighborhood, we picked a front door color... and then we picked another one! The new one is much better we think! We are using a red called "Sundried Tomato" to paint both the front door and the coop! This work is underway...
We wish you all a happy and thankful Thanksgiving!
Monday, November 7, 2011
Before and After Floor Plans

Speaking of big reaveals, pasted above is a "before and after" comparison of the old and new floor plans (a larger picture of the new floor plan is at the end of this blog). In the old home, when you first walked into the home, directly in front of you there was a staircase, a bedroom to the left, and hallway running to the kitchen.
You can see in the new floor plan drawing that now when you enter the room, you face the living room and are in a large open space from which you can see the kitchen, dining room and staircase.
The downstairs bathroom has been moved into the newest addition, which has been divided up from a single large space into three smaller spaces: a bedroom, a bathroom with laundry facility and the family room. We also added a back exit to the home, which has a double wide sliding glass door.
Upstairs, we started out with two small bedrooms. We took the original walls out and reconfigured the staircase to create a master bedroom suite. When you get to the top of the stairs, you enter a master befroom loft. There are two walk-in closets on the way to a nice sized master bathroom with a clawfoot tub (recovered from the original home and refurbished), a walk-in shower, and a linen cabinet, vanity and toilet. We'll post a more detailed diagram showing the bathroom and kitchen layouts pretty soon...
To create this new home layout, we considered how the home would look, feel and function for its new residents, and we're really happy with how it has turned out. This layout is the final result after many draft designs, consultations, and walk-throughs. Big thanks to all those who gave their two cents (or much more than that), particularly Peter and Henry, and also Jenn, Lisa, Matt, Jess, Andrea and Dennis!

Saturday, November 5, 2011
Ta Da! (and what a week)


If you live in the neighborhood, you've probably noticed the house being painted and the siding going up. And if you don't live in the neighborhood, then is the big reveal. Nice color, hey? We also think the front door looks pretty fabulous, and we're excited about the colors we are considering for the front door and shed.
A big part of this week was occupied by dealing with all the damage from the fallen tree. Henry and his crew did a great job moving quickly to keep the damage and delays to the project to a minimum. The fallen tree was carefully removed from the roof of the shed and the newest addition, and the remaining trunk that was still standing was removed as well. Thankfully, the tree didn't do much damage to the roof - only a few small spots need to be fixed.
Meanwhile, even though the site turned into a temporary disaster due to all the tree debris, everything else kept chugging along. Wood siding repairs were made, exterior paint was applied, the hardiplank siding went up, and foam insulation was sprayed. We had to iterate a few times on the spray foam application to make sure this very critical piece of the project was completed exactly as needed for LEED Certification. On Friday, we had our LEED inspection for the spray foam, and a few more touch ups were completed after the inspection. This morning (Saturday), we took pictures (for LEED Certification) to document the final spray foam touch ups, and we met with Henry to discuss the window caulking (sealing) and a few other small items that need to be addressed before drywalling starts next week.
So, here at the end of the week, drywall has been delivered, the site has been cleaned up, and we are ready for the spray foam insulation to be inspected by the city. A significant amount of debris has been removed from the site, the accumulated cardboard and clean wood have been taken away for recycling, and this morning the Silver Maple was being trimmed where it had suffered some limb damage. We also spruced up the site's erosion control measures (silt socks), cleaned up leaves, and removed sediment accumulated near the storm drain.
And of course, we're still moving as quickly as possible to finish all the weather sensitive work before it gets too cold...brrr
Monday, October 31, 2011
If A Tree Falls...
If a tree falls, and everyone in the neighborhood hears it, then it surely did fall.
Yes, unfortunately, a large tree fell during the snow and wind storm this past weekend. And of course, we finished the roof replacement not long before the tree fell on it. But, on the bright side, nobody was hurt and the damage really could have been much worse. So, we're counting our blessings and working as quickly as possible to clean things up and keep moving forward with the renovations.
Last week, the exterior paint started going up (and we think it looks great!) and the siding repairs to the original home and first addition were completed. A significant portion of the insulation work was completed as well. The cleanup in the aftermath of the storm is holding work up a bit, but we're still hoping that the painting and insulation can be finished by the end of the week. We are, after all, still racing against winter...
We hope you all weathered the storm well and have your power and heat back at home!
Saturday, October 22, 2011
Notes From The Yard
In other news, we removed the clothesline and it really opened up the backyard. Although a clothesline is a great eco-friendly feature for a home, the one that came with the house was huge and took up some of the best space for hanging out in the backyard. We also did some yard cleanup and shrub removal in the past week, and we began repairs to the coop. We haven't picked a coop color yet though - That decision will be made once the new siding is up and the exterior painting is done.
Finally, a number of original foundation stones were moved from the basement and piled in the yard. We've been considering a few different ideas for using these old foundation stones. One early idea we had was using them to build a fire pit. Another idea was to use them in the front yard or driveway to build a small retaining wall. Then, last week we gave a tour of the home to our friends and they gave us the idea of building planters with these beautiful old stones. The more we have mulled that idea over, the more we like it. We haven't made any final decisions yet however.
Finally, a number of original foundation stones were moved from the basement and piled in the yard. We've been considering a few different ideas for using these old foundation stones. One early idea we had was using them to build a fire pit. Another idea was to use them in the front yard or driveway to build a small retaining wall. Then, last week we gave a tour of the home to our friends and they gave us the idea of building planters with these beautiful old stones. The more we have mulled that idea over, the more we like it. We haven't made any final decisions yet however.
Rough Electrical and Structural Inspections Passed!
The rough electrical work was completed on Tuesday. It looks great and passed its inspection on Thursday. The home's structural work also passed inspection on Thursday. Meanwhile, we met with John, our painter, who is getting started on the exterior of the home on Monday, and the insulation work will now start on Monday as well. We pushed the insulation work off to next week in order to install additional strapping for hanging the drywall. In preparation for the exterior painting next week, Henry's crew has begun the siding repairs and purchased the exterior window and door trim.
Sunday, October 16, 2011
Not quite a warm blanket
While it perhaps isn't as sexy as picking out cabinets, flooring or plumbing fixtures, the energy measures taken in a building are critical. Perhaps our grandchildren will have the opportunity to choose between a plethora of recycled metal plumbing fixtures, ready to assemble cabinetry made from reclaimed materials, and the like. But, we're stuck in the "green" dark ages where significant focus is placed squarely on energy (which IS very important, of course). So...with that...let's pull up our sleeves and talk about the heating system.
This house will have a condensing boiler "combi" system. That sounds simple enough but is actually pretty sophisticated equipment. While our heating systems are not even close to approaching the complexity of your car...we've come a long way. When the fuel in your boiler is burned, the chemical reaction produces water vapor (which requires energy to form). It used to be that this water vapor would be exhausted into your chimney...dumping energy out the chimney. Now, we take those warm exhaust gases and allow them to decrease in temperature, which causes the water vapor to condense into liquid water ... in turn releasing energy. It's a relatively small amount of energy that is captured ... but this gets your boiler from 85% to 90% efficiency. That's the "condensing" part.
Now, the "combi" part means that we are combining the boiler with the water heater. Rather than having a combustion system in the water tank and a second (typcially more efficient) one in the boiler ... wouldn't it be smart to have just one combustion system? So...there are two main ways that a combi system can be made. One is to circulate water through the combustion system "on demand", meaning that if you open your hot water spout, your heating unit kicks on and heats the amount of water you need when you need it. This can require a really big combustion system ... but you don't have to store a tank of water. On-demand systems are an efficient choice for small and/or intermittent uses (like vacation homes) or may be a good choice for homes with limited space. The other option is to store a tank of water, and periodically circulate the water through the heating system burner in order to keep it hot until you are ready to use it. This system is quite similar to a conventional water tank except that the tank does not have it's own combustion system, but borrows the combustion system from the space heating system. That's what we picked out...the tank option is more efficient than the tankless option when you use hot water frequently.
Still with me? Ok, one of the last (and I think coolest) tricks is that the latest and greatest heating systems now measure the outdoor temperature to adjust the water flow rate through the house. That way, when it is warmer outside you dump less heat into the house than when it is colder outside. Remember a time (usually in what we call the "shoulder season" during Fall and Spring) when you were a little cold, the heating system would turn on, and you would roast...then open your windows? This was because the heating system could not regulate the amount of heat added to the house ... only whether or not to add heat. Heating systems were sized to make sure you got enough heat in the coldest part of winter ... and the rest of the time, you could always open your windows! The amount of fossil fuels literally thrown out the window over the past 100 years is astonishing. Arguably, adding variable speed pumps to heating systems is one of the greatest energy savings measures made to heating systems over the past few decades.
Now for distribution. There are two main ways that energy generated in the combustion reaction is distributed within the home nowadays....with liquid water or air. We chose liquid water becuase it holds more energy per mass, has a lower profile (small baseboard heaters rather than larger openings for air ducts), and is considered to be more efficient (although this depends on quite a lot of things ... but generally, air ducts are leaky sieves and a huge pain to keep tight over the years). A heat exchanger (think of the radiator in your car) sits inside the heating system. When the fuel is burned, it transfers heat energy to the liquid water, which is circulated through baseboard radiators throughout the house.
We've also elected for 4 thermal zones within the house, one for each bedroom and one for the living room/kitchen/family room/dining room "communal" spaces. 4 zones are way overkill but this is such a nice feature in a home. The homeowners will be able to set different temperatures in these spaces depending upon how they choose to use the rooms (office, playroom, sleeping room, ...).
So, as you can see, we really invested in making sure we had a robust, reliable and incredibly efficient heating system. It's nice to know that someone will thank us for that!
Thursday, October 13, 2011
Racing Against Winter
Although the never ending rain held us up considerably, the roof is now complete! If you go by the house, you can see it. We are pleased with the shingle color and think it will go well with the color of the house.
Meanwhile, Henry's crew is working on the wood siding repairs and the window and door trim in preparation for painting the exterior of the home, which is scheduled to start in the middle of next week. Paint cannot be applied when the temperatures are below freezing...so we are racing against winter. But, just to be safe, we are using low-temperature paints. These (acrylic) paints allow paint to be applied in 35 to 50 degree weather. However, we'll need to keep a careful eye on the weather each day. The paint must be applied at least one hour before temperatures drop below freezing.
We've set a deadline of finishing all exterior painting (house, shed) and sealing (porch, stairs) by the end of the month. Ideally, it would be best to have the drywall finished before installing the decking in order to minimize the potential for damage to the deck as materials are trekked in and out of the house. So, we're moving as quickly as we can: Before the drywall can be installed, however, we need to finish the electrical and insulation work...
On Tuesday, we met with our electrician Jeff Marney (Marney Electrical Services) to finalize our rough wiring plans. It is amazing how detailed a lighting plan needs to be. You not only need to select the exact location, fixture type (and, ultimately, fixture) for all lighting, but you also need to think through which lights require their own switches, which ones should be switched together, and where to locate all of the switches.
Peter, our realtor (and design consultant), helped us with our first draft of the lighting scheme for the house. As we have refined the lighting plan, we have walked through the house many times, envisioning how each room would look and how the home occupants would use each room and its lights, where it would be convenient to have switches, which lights required dimmers, etc. In addition to aesthetics and convenience, we also needed to consider structural constraints that affect where (and what type of) lights and switches can be installed. Finally, we had to consider Energy Star and LEED for Homes requirements.
In addition to lighting, the electrical work includes includes wiring for all appliances, smoke and carbon monoxide detectors, thermostats and the heating system, phone and cable lines, and electrial outlets.
So, at this point we know exactly where each appliance, smoke/carbon monoxide detector, thermostat, phone/cable jack and electrical outlet will be located.
So the electrical work began yesterday and continues today. Jeff's crew (Matt and Josh) began running wires for the telephone and cable lines yesterday. Multiple phone lines (allowing for phone, fax and wireless internet) are being provided in the kitchen, family room and all bedrooms. Cable lines are being provided in the family room and all bedrooms. We expect the electrical work to be completed by Monday, and the insulation work will follow...
Thursday, October 6, 2011
Windows and Doors Are In! (October 6th Update)
The windows and doors (except the front door) are now installed! Last we looked, the windows were looking great, and we're excited to take some pictures of the back sliding door.
The rough plumbing is also nearly complete (with just a few finishing touches remaining), and the heating system installation is underway. We are still waiting for the final electrician quotes to come in today, and we will schedule this work for next week. We have scheduled the insulation work to start the following week.
We made plans for moving forward with the siding installation next week too. After speaking with Henry, we decided that the existing plywood siding will be used as the sheathing for the new Hardiplank siding. So, this means a small change to the insulation plans: Today, we removed what remained of the sheet rock walls in the newest addition (most of it had already been removed in the process of framing the new windows and the double wide back door), and now all of the insulation will be sprayed in from the interior. So, the siding work no longer needs to be coordinated with the insulation work (yay!).
We also spruced up the erosion control measures, as the the silt socks had begun to rip open. We removed the mulch from the broken silt socks and also used the remainder of the mulch we originally puchased in order to rebuild a longer silt sock that now streches across the entire driveway. We made this longer silt sock because the grass on the sides of the driveway has been compacted by vehicles, and dirt has been exposed in some places where there used to be grass. Although we do already have a silt sock around the storm drain on the street, we want to do everything we can (i.e. install redundant measures) to prevent sediment erosion from our site into the storm drain (and our rivers).
That's the scoop for this week...
Thursday, September 29, 2011
"No Vinyl, That's Final"
Our amazing builder, Henry Souza, was at EcoBuilding Bargains last week and noticed that they had some Hardiplank siding. We were excited, as we had already planned on installing Hardiplank (fiber-cement) siding.
Why, you ask? Well, here is a summary of the environmental attributes of available siding material options: www.sierraclubgreenhome.com/additional-information/pros-and-cons/. If you went to this link you would see that vinyl siding is a no go for the eco-conscious consumer.
If you need more information to be convinced, here's additional explanation courtesy of Umbra Fisk of Grist Environmental News: "Why do we want to identify and avoid [vinyl]? Because its manufacture, use, and disposal involve dioxin, phthalates, lead, and other nasties that can cause cancer, endocrine disruption, endometriosis, birth defects, respiratory problems, and immune system damage. Because the full range of its effects on human health hasn't been fully determined. And because there are indeed alternatives, including other types of plastic, that are not nearly as damaging to the environment and to our health." Wow, that's quite an indictment. Umbra often urges her readers to remember "No Vinyl, That's Final", and we've done our best to observe that rule during this development project. You can read Umbra's full blog on this topic here: http://www.grist.org/article/pvc1
So, this presented us with a problem, as vinyl is far and away the most widely available (and least expensive) siding material. However, we did our research and decided that it would be best to install Hardiplank fiber-cement siding. We learned that it is a little more difficult to find fiber-cement siding products and even more difficult to find contractors who install them. We selected a color (stay tuned for the big reveal on our color pallette), and we found a builder's supply company in Springfield (Bradco) that keeps some Hardiplank colors in stock (which is necessary for our timeline). Thankfully, they stock the color we want. Whew! But then, Henry noticed the Hardiplank siding at EcoBuilding Bargains, and they happened to have our color! Yay! So, we've now got some siding coming our way! And, we've found a few contractors who install this type of siding to boot! Onward!
Wednesday, September 28, 2011
Roof, Mechanicals, Plumbing, Windows & Doors, Oh My
Last week, we selected an Energy Star Certified shingle (Certainteed Landmark Silver Birch) and roof replacement work commenced. The rainy weather has slowed progress somewhat, so we still have about two days of work remaining. To qualify as Energy Star, the shingles are a relatively light color that reflects more light and keeps the roof surface cooler, which in turn helps keep the home cool in the summer (less heat is transmitted into the home from the roof). And there's another environmental beneift as well: Lighter colored shingles also help to minimize urban heat island effects.
We also solicited bids for our mechanical systems and rough plumbing last week. We are installing a combined boiler and domestic hot water system with a combined efficiency of 90% (0.90 AFUE). In addition, we will increase energy efficiency by insulating hot water pipes, reducing the length of hot water pipe runs, installing an outdoor reset control that modulates distribution water temperature based on outdoor air temperature, installing a programmable thermostat, and zoning the house on four zones. Finally, all domestic hot water and boiler equipment will be installed within an insulated basement utility closet.
Work on the mechanical systems and the rough plumbing commenced on Monday and should be completed by the end of the week. Rough-in plumbing is being installed for the kitchen (one sink, dishwasher, and gas stove), one bathroom (clothes washer, sink, toilet, bathtub/shower), and the master bath on the second floor (clawfoot tub, toilet, sink and separate shower).
After the plumbing work, our next step is the electrical wiring. The entire house must be rewired. Fortunately, all of the old knob and tube wiring was removed during demolition. We are getting bids on the electric work and trying to schedule it for next week.
Meanwhile, our windows and doors arrived TODAY at Pella's Greenfield warehouse! These will be picked up tomorrow morning and installed over the next several days.
We've also ordered the siding for the back addition to replace the plywood siding. We'll save that for another post when we reveal the new house color scheme!
Saturday, September 24, 2011
Before and Afters Compared, Part 3
The first floor bedroom that was located at the front of the home (facing the street, in the original portion of the home) will continue to be used as a bedroom:
The new bedroom has been widened, and there will be a large bedroom closet located beneath the new staircase (image taken from closet location). Otherwise, the new room will be largely the same. The windows will be repaced with energy efficient upgrades, new lighting will be added, and the existing floors will be refinished.
The picture above also gives a view of some of Henry's excellent structural work!
As you can see, the walls of the new addition were originally left intact. However, we needed to replace the entire subfloor (shown partially replaced here), and in the new floor plan, this 500 square foot addition has been divided into three rooms: A bathroom with laundry facilities (to the left), a bedroom (to the left), and a family room (to the right, partially shown in image). To change the layout, new walls have been framed framed (pics coming soon), and we had to redesign the window scheme. The windows shown here have since been removed, the new window frames have been constructed, and a frame for a double-wide sliding door leading from the family room to the backyard has been completed.
 |
| Bedroom at Front of Home Before Gut |
 |
| Bedroom At Front of Home After Gut |
The new bedroom has been widened, and there will be a large bedroom closet located beneath the new staircase (image taken from closet location). Otherwise, the new room will be largely the same. The windows will be repaced with energy efficient upgrades, new lighting will be added, and the existing floors will be refinished.
The picture above also gives a view of some of Henry's excellent structural work!
---
Finally, the new addition will be changed significantly, but this was not apparent after demolition was completed because we decided to keep the walls, which were in good shape. Where these exterior walls have been kept, we will have to come in from the outside to insulate the walls, replacing the current batt insulation with spray foam insulation. This will be done when the siding for the new addition is replaced.
 |
| New Addition Before Deconstruction |
 |
| New Addition After Deconstruction |
As you can see, the walls of the new addition were originally left intact. However, we needed to replace the entire subfloor (shown partially replaced here), and in the new floor plan, this 500 square foot addition has been divided into three rooms: A bathroom with laundry facilities (to the left), a bedroom (to the left), and a family room (to the right, partially shown in image). To change the layout, new walls have been framed framed (pics coming soon), and we had to redesign the window scheme. The windows shown here have since been removed, the new window frames have been constructed, and a frame for a double-wide sliding door leading from the family room to the backyard has been completed.
Before and Afters Compared, Part 2
Second Floor: Before
Second Floor: After
 |
| Bedroom 1 |
 |
| Bedroom 1 (Closet) |
 |
| Bedroom 2 |
 |
| Bedroom 2 (Closet) |
 |
| Top of Staircase Entryway to Bedrooms |
Second Floor: After
 |
| Top of New Staircase |
 |
| New Master Bedroom Area With Vaulted Ceilings (Clawfoot Tub Will Be Refinished and Moved to Master Bath) |
 |
| Panorama of Gutted Upstairs, View from Top of Stairs Master Bedroom to Left, Closets and Bathroom to Right (New Wall Framing in Progress) |
 |
| View West from Master Bedroom (Master Bathroom and Closets Being Framed to Left) |
Before and Afters Compared
Here are some selected "Before Pictures" followed by pictures taken after all the walls were removed (and as the new walls started to be framed). Also, please visit our new Pictures page!
First Floor: Before
Originally, this portion of the house contained the kitchen, a pantry and a bathroom. In the new layout, this part of the house has been opened up and will contain the kitchen and dining room. The downstairs bathroom has been relocated to the newest addition.


View of Kitchen Facing South View of Kitchen Facing West Toward Newest Addition


View of Downtstairs Bath from Kitchen, Facing North
In the picture above, you can see that the wall between the original home and first addition has been removed. This creates an open layout in the home's three central living areas (kitchen, dining room and living room). The living room will be the area to the back of the image (in the original home to the right of the new staircase). When we purchased the house, this area was a bedroom:
Staircase: Before and After
Here's a quick before and after of the staircase!
(Please excuse the formatting irregularities in this post - Blogspot doesn't make it easy to lay out pictures!)
First Floor: Before
Originally, this portion of the house contained the kitchen, a pantry and a bathroom. In the new layout, this part of the house has been opened up and will contain the kitchen and dining room. The downstairs bathroom has been relocated to the newest addition.


View of Kitchen Facing South View of Kitchen Facing West Toward Newest Addition

View of Pantry and Bathroom from Kitchen, Facing North

View of Downtstairs Bath from Kitchen, Facing North
 |
| Kitchen (left) and Dining Room (right) View Facing West Toward Newest Addition |
 |
| View of Portion of Kitchen (Left) and Dining Room (Right) View Facing North |
The picture above also gives a nice view of the collar ties installed for structural support. The walls in the second addition were being pushed apart (separating) under the weight of the roof, so collar ties were needed for additional structural support. When Henry installed the new collar ties, we discovered that the framing for the ceiling drywall would need to be replaced as well. Instead of rebuilding this framing, we decided to remove the framing entirely and create a room with a vaulted ceiling. We think the result is going to be fabulous!  |
| Dining Room (Left) and Kitchen (Right) View Facing East Toward Original Home |
 |
Bedroom in Original Home View Facing North from Front Door |
The walls in the picture above were removed. This area will become the living room in the renovated home.
 |
| Here is a nother picture of the main portion of the home that has been opened up. This picture is taken from the kitchen looking east. To the left is the new dining room and in the center is the new living room. |
The picture above also shows the new staircase nicely (located to the left of the living room). Here is a picture of the original staircase:
 |
| The original staircase was directly in front of the front door View Facing North |
 |
| Panorama View of the Kitchen (Left) and Dining Room (Right) |
 |
| Another View from Kitchen to the Dining Room and Living Room Areas |
The image above shows the vaulted ceilings nicely. The door to the right, which originally was a second door that entered the kitchen from the porch, has since been removed and replaced with a window frame. A second door will be added to the back of the home, through the newest addition.
Here's a quick before and after of the staircase!
|
| The original staircase was directly in front of the front door View Facing North |
 |
The new staircase is located on the north wall across the living room from the front door (in the original portion of the home). In the background to the left/west, you can see the first addition where the kitchen and dining room will be. |
Wednesday, September 14, 2011
Walls and Windows are Framed
Well, we survived the hurricane just fine. Having completed our preparations, Northampton escaped the heavy winds and rain that were forecasted. The silt sock around the street drain is back in place and construction never halted.
Henry's crew is nearly finished framing the walls, closets, windows and doors. As it turned out, there were no headers framed for the windows or doors. It is quite surprising that they held up as well as they did, literally. Henry's structural work is truly impressive and has received many complimements from other contractors. It's too bad this work will be hidden inside the walls.
The floor plan has been solidified and the 300+ sq. ft. second floor master bedroom/master bath will be really amazing if we can say so ourselves! Also, sliding glass doors will provide a back exit from the house through the family room, the kitchen will have bamboo cabintry and a beautiful south facing double casement window, and we've kept the laundry facilities out of the basement...phew! Windows have been ordered and are scheduled for installation in a few weeks. We're lining up the rough-in plumbing and heating and hot water systems now (these are critical to this home's energy efficiency). We're excited to be at this stage in construction...where our hard work starts to come together.
Saturday, August 27, 2011
Finalizing Floor and Window Plans
Over the past week, we've had two design meetings with Peter and Henry to finalize the floor and bathroom plans and then window schedule. We've got the floor plans more or less nailed out at this point, with a few final changes being made in the master suite. Stay tuned for more details on the new layout. Meanwhile, Henry is getting started with framing the interior walls for the downstairs rooms. Next week, we'll have another design meeting for the kitchen.
We're also preparing for the hurricane...putting plywood over one of the windows that got broken during deconstruction, and Billy, our mason, is at the house today securing the foundation. He is finishing the brick work and replacing several of the basement windows.
We hope everyone is well-prepared for the storm! And thanks to whichever neighbor pulled up the silt sock that we placed around the drain.
Tuesday, August 23, 2011
Stairs, Layout....
Henry is nearly finished building the new staircase in its new location (along the north wall of the original home instead of at the center of the original home)... and it looks amazing! Yesterday, we met with Henry and Peter to refine the layout plan... including where we will locate walls, closets, etc. We also talked about changes that will be made to the location and size of windows and doors...In addition, all the windows and doors in the house need headers (they are currently not framed to code), so this will need to happen pretty soon.
This week, we're hoping to finalize the location of the interior walls and at least some of the closets so that Henry can frame these walls next week. We are also going to spec out all window and door sizes so that the rough openings can be framed next week.
This week, we're hoping to finalize the location of the interior walls and at least some of the closets so that Henry can frame these walls next week. We are also going to spec out all window and door sizes so that the rough openings can be framed next week.
Monday, August 15, 2011
Waste Management (Initial Pics)


These are pictures of the waste management measures we set up at the site after deconstruction was completed (this area was used to store salvaged materials during deconstruction). In the construction phase, we are going for LEED points associated with minimal waste production (allowing a maximum of 2.5 lbs of landfill-bound waste per square foot of interior space). To help mee this credit, we established these recycling areas for clean wood and metal. We also set up areas for cardboard and recyclable plastic containers. Since these original pictures were taken, we've made some small changes in order to expand the clean wood recycling pile, and to improve the signage... more pics on that later...
Thursday, August 11, 2011
Erosion Control Measures (Pictures)
One requirement for LEED for Homes Certification is that all projects implement erosion controls during construction. This is required because construction can result in considerable runoff, leading to soil erosion and alteration of natural drainage patterns. Soil can be lost from the site in this way, and this runoff carries pollutants and debris to water bodies (in our case, the Connecticut River). To prevent these environmental impacts, all LEED for Homes projects are required to take measures to limit soil erosion at the building site.
In consultation with Josy, our LEED Rater at the Center for EcoTechnology, we determined that silt socks should be used to minimize sediment runoff from the site and protect the storm drain on the street at at the base of the site. Silt socks are made of a filter fabric sock that is filled with wood chips or compost (we used cedar wood chips). Silt socks allow water to flow through them at a controlled rate while trapping sediment. The sock is in contact with the ground, preventing water from flowing underneath.
Installation of Silt Sock Around Storm Drain at Base of Site

Silt Sock After Several Days (Note Trapped Sediments)

We also installed a silt sock across the driveway to prevent sediments in stormwater runoff from the dumpster area from running down the driveway and leaving the site (View From House):

View of Both Silt Socks from Street

Close-Up of Driveway Silt Sock (View from Street)

Unfortunately the driveway silt sock shown here was run over by the dumpster driver when our last dumspter was changed out. This broke the silt sock and it needed to be repaired. The new silt sock runs across only the paved portion of the driveway, and a shorter silt sock now runs across the paved walkway to the right.
Wednesday, August 10, 2011
Salvaged Materials from Deconstruction (Pictures)
Here are some pictures of the salvaged materials from the deconstruction. As we previoulsy mentioned, some of of the salvaged materials were taken by EcoBuilding Bargains (formerly the ReStore), but many of these items found a new home through Craigslist.
Doors and Mirror


Doors and Mirror

Doors and Miscellaneous Lumber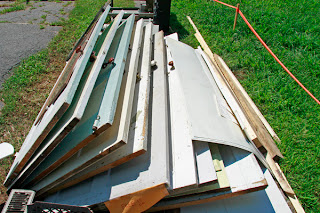

Face Plates

Oil Furnace

Fixtures (in Foreground):
Ceiling Fan, Light Globes, Etc.

Storm Windows

Direct Vent Gas Heaters (2 Total, One Shown)

Not Pictured: Grab Bars (2), Natural Gas Water Heater (moved to our house to replace leaking heater!). Also, we have salvaged a few items for possible reuse on site, including bricks, original slate roof tiles, and large foundation stones.
Subscribe to:
Comments (Atom)